Gluten Free Perogies took the win this week!
Whether you grew up with them or they became a staple in your diet during those lean university years, perogies are the ultimate comfort food. Simple to boil and fry up right out of the freezer, even the most nervous cook can get them just right. Topped with some bacon, caramelized onions or sour cream you get a warm delicious meal with tons of flavour.
Sadly, this oh-so-easy offering from the grocery store freezer isle does not fit into a gluten free world. My love for these crispy dough pockets filled with cheesy potatoes and desire to avoid a 2-day stomach ache brought me to the kitchen in search of a solution.
The dough was a little bit tricky to work out because it took me a few different combinations to get the right texture but I think I’ve nailed it, and to save you the trouble of trial and error, I’ll share.
The dough itself is quite simple. It takes less than 5 minutes to put together and is surprisingly pliable without being sticky.
Here is your list of ingredients:
Dough
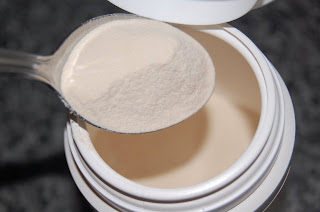
1/2 cup corn starch
1 cup white rice flour
1 cup millet flour
1 tsp Xanthan gum
1/2 tsp salt
3/4 cup of milk
2 egg whites
Filling
2 medium potatoes, peeled and cut into 1inch cubes (I like Yukon Gold)
1 tbsp butter
1/4 - 1/3 cup milk
Salt & pepper to taste
(optional additions include: garlic, cheddar cheese, bacon, caramelized onions and anything else you like in your potato)
1 egg white for sealing
Instructions:
To make the dough, whisk all dry ingredients together and then add the milk and egg whites in one addition and mix with a wooden spoon until it starts to come together. The mixture will still look a little crumbly.
Use rice flour to cover your counter and then pull out a big handful of dough. Knead it until smooth and evenly mixed (about 10 times). Roll dough out on a freshly floured surface until fairly thin (about 1/4cm) and use a big round cutter (I used a martini glass) to make the rounds. Gather the scraps and knead together gently and these can be rolled out again. This recipe makes enough dough for about 15 large rounds.
While you are preparing your filling make sure to store the rounds under a damp dish towel to ensure they don’t dry out.
Next make your filling. Boil potatoes until they split when you poke them with a fork and then mash with butter and milk. Stir in salt & pepper and any of the optional ingredients you wish (I made this batch with cheddar cheese).
To fill, take one dough round and using your thumbs and first two fingers work like you would with pizza dough. This puts a bit of a pocket in the dough which is helpful for filling. Don’t be concerned if can’t do this part, it’s not imperative for the success of your perogies!
Place a heaping tablespoon of filling in the center of the round and brush a tiny bit of egg white around the edge. Fold over and pinch the edges together to seal then take a fork and crimp the edge to seal extra tight!
Transfer perogies to a floured non-stick mat or parchment on a cookie tray and pop into the freezer for at least two hours. Once frozen, you can cook right away or place in a bag and return to the freezer.
Cooking Instructions:
Many people simply boil their perogies and do not explore my personal favorite method of pan frying. Although optional, this extra step gives the dough a lovely crispness which is a great contrast to the smooth potato filling.
From frozen, boil perogies for about 5 minutes. While boiling, heat and frying pan with about a tablespoon of butter or olive oil and sauté some sliced onions until tender and caramelized. Use a slotted spoon to remove perogies from boiling water and add to pan. Fry perogies until browned and crispy, flipping once.
Perogie Cooking Tip for Fewer Dishes:
The only reason I can think of that would cause cooks to skip the pan frying step is the extra dishes involved.
Solution:
To boil and fry in one pan put about an inch of water in a non-stick frying pan with about a tablespoon of butter or olive oil and bring to a boil. Add the perogies and boil uncovered. As the water evaporates, the butter or oil greases the pan and they fry up perfectly!! Takes 12-15 minutes.
Voila!
Be sure to keep an eye out for the runner-up recipe for Fudgy Gluten Free Brownies, coming soon! Also use the voting buttons above to have your say on other recipes you would like to see here soon.
Happy Cooking!